You bought a house in the Algarve. You brought a drill, a box of red wall plugs and forty years of knowing how to put up a shelf. You drill into the bedroom wall, the bit suddenly drops through as if it hit air, and a small pile of red dust lands on the floor. The plug spins in the hole. The shelf comes off the wall a week later, taking a plate of plaster with it.
Nothing about your technique was wrong. The wall is different, and nobody warns you.
Portuguese houses are mostly built with hollow clay brick, and older ones in Tavira are built with lime, rubble and whatever came out of the ground. Neither behaves like a British cavity wall or a solid nineteenth century brick. This guide covers how to tell what you have, what actually holds in it, and where the point is that a heavy object stops being a DIY job.
The four walls you will meet in an Algarve house
Almost everything in this region is one of these, and the same house often has all four.
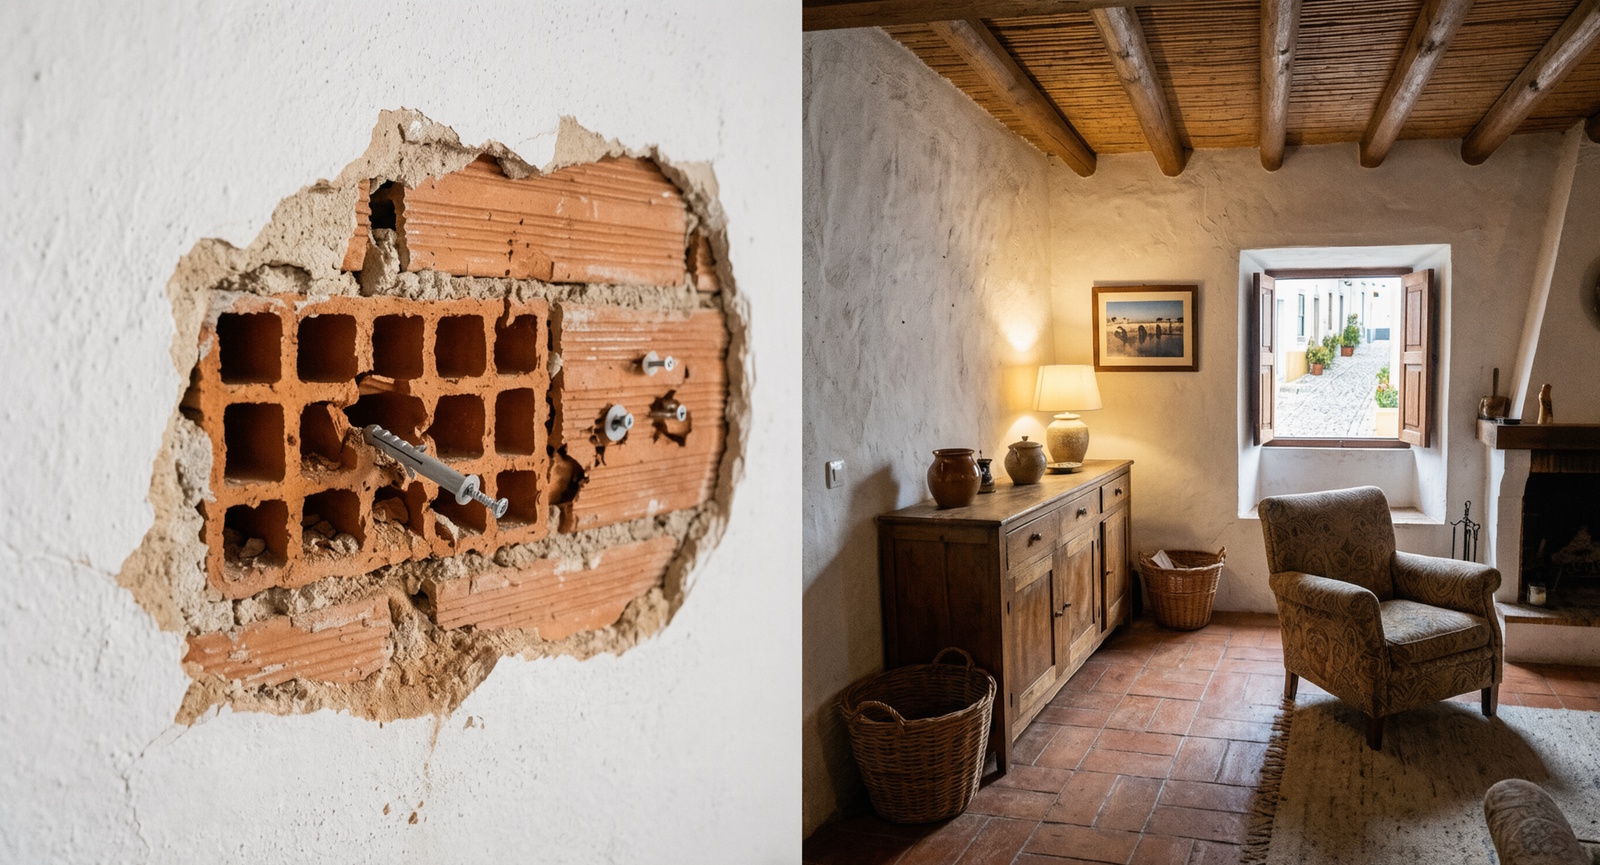
Hollow clay brick, tijolo furado. The default for internal and external walls in anything built or renovated since roughly the 1960s. The brick is a grid of air cavities with thin ceramic webs between them, sometimes only eight to twelve millimetres thick, all covered in plaster. Structurally fine. Terrible for fixings, if you treat it as solid.
Reinforced concrete. Columns, beams and lintels, usually at corners, around door and window openings and along the top of walls. Rock solid, and the only place in a modern house you can hang something heavy without thinking hard.
Old lime and rubble. The town houses in Tavira’s centre. Thick, soft, irregular, often with a lime plaster that turns to powder when you drill it. Can be excellent or hopeless within the same metre of wall.
Plasterboard. Increasingly common in renovations for partitions, dropped ceilings and boxing in. Sounds hollow, feels hollow, and needs its own fixings entirely.
The knock test, and the drill test
Before you buy anything, find out what you are working with. It takes ten seconds.
Knock the wall with a knuckle. A hollow, drummy sound means hollow brick or plasterboard. A completely dead, solid sound means concrete or old solid masonry.
Then read the drill. This tells you more than the knock does.
| What you feel and see | What it is |
|---|---|
| Resistance, then the bit drops through into a void, orange or red dust | Hollow clay brick |
| Hard, slow, grey dust, drill wants hammer action | Concrete |
| Very easy, pale powdery dust, hole edges crumble | Lime plaster or soft old masonry |
| Almost no resistance, then a void, white or grey dust | Plasterboard |
| Sudden stop and the bit skates sideways | You have hit a hidden lintel, or reinforcement bar |
Two rules before the drill goes anywhere near a wall. Use a detector for cables and pipes, and remember that in Portugal wiring does not reliably run in the neat vertical and horizontal zones you may be used to. Renovated in phases, by different hands, over decades, means cables run diagonally more often than anyone would like. And in a bathroom or kitchen, assume there is a pipe behind the tile until a detector says otherwise.
Why your red plug fails in hollow brick
This is the whole article in one idea.
A standard nylon expansion plug works by friction. You drill a hole in solid material, the plug goes in, the screw forces the plug to expand outwards, and it grips against the sides of the hole hard enough that it cannot be pulled out. It is a beautiful piece of engineering in concrete or solid brick.
In hollow brick there is nothing for it to expand against. The plug reaches a void, has no wall around it, spins or slides, and comes out at the first real load. Standard expansion plugs are explicitly not for hollow brick or cavity walls, because the fins have nothing to expand into.
What works in a hollow wall is a fixing that changes shape behind the material rather than pressing against the sides. It folds, knots or opens out behind the thin ceramic web and locks mechanically. That is a different family of product, and it is the one you need to buy.
The failure is almost never the screw or the drill. It is a solid wall fixing used in a hollow wall.
What to use, by wall and by weight
| Wall | Light items | Medium | Heavy |
|---|---|---|---|
| Hollow clay brick | Long nylon plug reaching two webs | Metal cavity plug or purpose made hollow brick plug | Chemical anchor with sleeve, or fix into concrete instead |
| Concrete | Standard nylon plug | Standard nylon plug, correct depth | Through bolt or chemical anchor |
| Lime and rubble | Long plug, or plug bedded in adhesive | Chemical anchor | Chemical anchor, or a timber batten spreading the load |
| Plasterboard | Self drilling plasterboard plug | Metal toggle or spring toggle | Find the metal stud, or fix through to the wall behind |
A few notes that matter more than the table.
Chemical anchors are the honest answer in old and hollow walls. A resin injected into a mesh sleeve fills the voids and bonds to whatever is actually there, which is the only reliable method when you cannot know what is behind the plaster. For hollow brick in Portugal, longer plugs or chemical anchors are the standard recommendation for meaningful loads.
Spread the load rather than increasing it. A timber batten screwed at six points, with the heavy item mounted to the batten, is a far better solution in soft or hollow walls than four heroic fixings. It is what we do on almost every TV in an old house.
Never rely on one point. In hollow brick, four modest fixings beat two strong ones, because you are relying on thin ceramic webs and any one of them may be cracked already.
Getting the details right
Small things that decide whether a fixing holds.
The plug number is the drill size. An 8 plug means an 8 mm hole. Not 7, hoping for a tighter fit, and not 10 because that is the bit already in the drill.
The screw must reach the full length of the plug. A screw that is too short only expands the front section, which drastically reduces what the fixing will hold. Add the thickness of whatever you are mounting to the plug length, and buy the screw accordingly. A bracket 10 mm thick on a 50 mm plug needs at least a 60 to 70 mm screw.
Clear the hole. Dust in the bottom of a hole stops the plug seating and kills the grip. Blow it out or vacuum it, especially in lime where the hole fills with powder as you drill.
Turn the hammer off in hollow brick and in old lime. Hammer action shatters the thin webs of hollow brick and turns a clean hole into a crater. Use it in concrete, and only in concrete.
Pre expand the plug where the material is poor. Drive a slightly longer temporary screw to fully expand the plug, remove it, then fit the real fixing. The plug beds into the irregularities first and grips better under real load. This is particularly effective in old plaster and aged brick.
The specific jobs people get wrong here
Wall mounted TVs. The most common failure we are called to fix, and the most expensive. A large screen on a cantilevered arm applies enormous leverage to the top fixings, and hollow brick simply will not take it on four plugs. On an internal partition wall the honest answer is often that it should not go there at all. A batten, a chemical anchor, or a different wall.
Kitchen wall units. Loaded with crockery, they are far heavier than people estimate, and they usually sit on a hollow partition. A properly fixed hanging rail is the answer, not individual plugs behind each cabinet.
Bathroom fittings. Every fixing goes through tile, which needs a tile bit and no hammer for the first few millimetres, or the glaze chips out in a ring around the hole. And behind the tile is where the pipework is.
Awnings, pergolas and anything outdoors. These take wind load, which is a shock load rather than a static one, and in a salt environment the fixings themselves corrode. Stainless steel, into concrete or chemically anchored, or not at all. An awning that pulls out of a wall in a Levante wind takes a large piece of the wall with it.
Handrails and grab rails. Anything a person will put their weight on, especially in a bathroom, is a job to over engineer. This is not the place to find out the wall was hollow.
Flat pack on uneven floors. Not a fixing problem, but it belongs here. Old Algarve floors are rarely flat, and a wardrobe assembled flat on the floor and then stood up will not close properly. It needs levelling first and, if it is tall, securing to the wall, which brings you straight back to the hollow brick question. That combination is most of what furniture assembly and wall mounting actually involves here.
Old Tavira town houses are their own problem
Everything above assumes you can identify the wall. In the historic centre you often cannot, and that changes the approach rather than the products.
A wall built in the nineteenth century from rubble stone bedded in lime, rendered in lime plaster, then rendered again in cement by somebody in the 1980s, and skimmed once more in the 2000s, is four materials in one hole. The drill passes through soft, then hard, then a void where a stone is missing, then soft again. No fixing chart covers that.
The method that works is to accept you cannot know and to fix accordingly. Chemical anchor into a cleaned hole, so the resin fills whatever irregular space is actually in there. Or spread the load across a batten so that no single point carries much. And test before you trust: hang the load, or something close to it, and leave it a day before you rely on it.
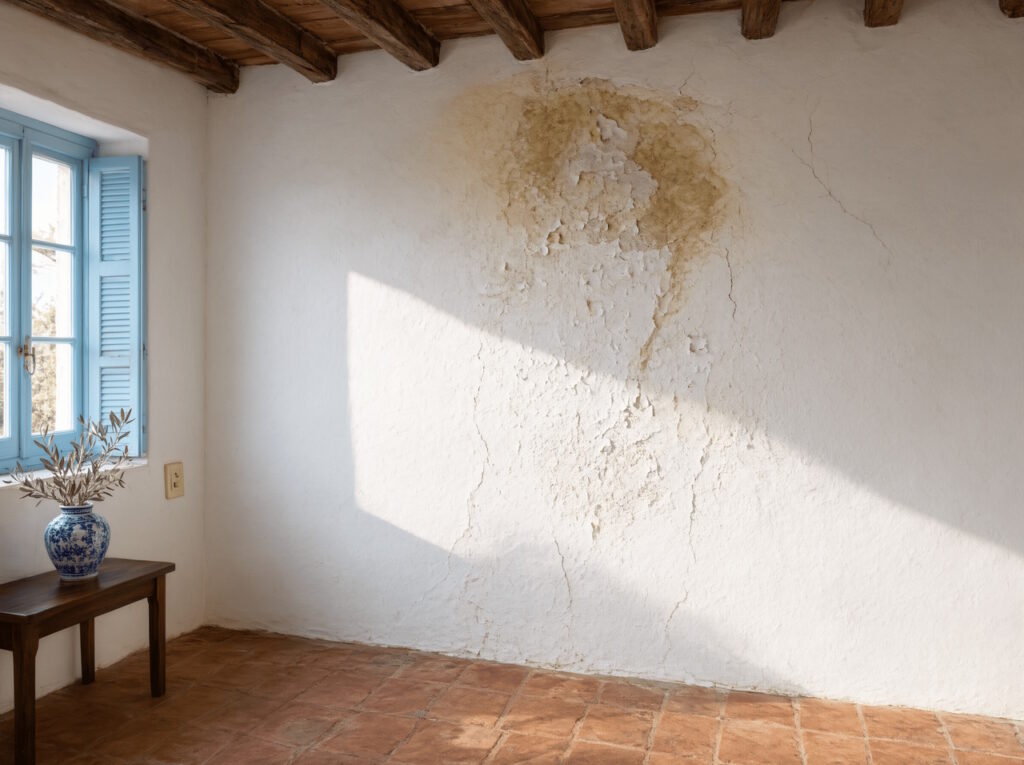
There is a second reason to be careful in these houses. Cement render over lime is a common and damaging combination, and drilling a line of holes into a wall that is already holding moisture gives it more routes in. If the wall you are fixing to is one that goes damp in winter, deal with that first, since we cover why in the guide to houses that stand empty.
Outdoors, salt changes the answer
Between the Ria Formosa and the salt pans, the air here carries salt all year, and it attacks the fixing rather than the wall.
An ordinary zinc plated screw in an exterior wall in Cabanas or Santa Luzia will show rust within a season and will be a stain running down your paintwork within two. Worse, as steel corrodes it expands, which cracks the masonry around it from the inside. That is what causes the rust coloured spalling you see under old awning brackets and gate hinges all over the eastern Algarve.
Outdoors, the rule is stainless steel, ideally A4 marine grade near the water, and nothing else. It costs a few euros more and it is the difference between a fixing that lasts fifteen years and one that fails in three. The same applies to gate hardware, hinges and lock cases, which is most of what door, lock and window work consists of here, and to anything bolted to a pergola or a deck, covered under carpentry and outdoor woodwork.
What it is reasonable to do yourself
A rough line, drawn from experience of what gets fixed twice.
Picture hooks, small shelves, curtain rails, towel rails, mirrors up to a modest size and coat hooks are all fine with the right plug and ten minutes of care. Buy hollow wall fixings before you start rather than discovering the problem halfway through, and buy a mixed box, because one house will contain three kinds of wall.
Where it stops being sensible: large televisions, kitchen units, anything structural, anything outdoors that catches wind, anything holding a person’s weight, and anything on a wall you cannot identify. Also anything where a mistake is expensive to repair, which in a tiled bathroom or a lime plastered old town wall means most things.
If you have a list of small items rather than one big one, that is the case for doing them together. It is the same trip, the same kit, and the same drill in the bag, which is why we price by the half day rather than by the job. Rates are on the prices page, and a typical odd jobs half day clears four to seven items.
Tools worth owning if you have a house here
- A drill with a hammer function you can switch off, which is the important part.
- Masonry bits in 6, 8 and 10, plus a tile bit.
- A cable and pipe detector. Cheap, and the one tool that prevents an expensive day.
- A mixed box of hollow wall fixings, not just the red plugs that came free with something.
- A spirit level long enough to be useful, because nothing in an old house is square.
- A tube of chemical anchor and a few mesh sleeves, which will sit unused until the day they save you.
If you are buying for a house you use a few weeks a year, that is genuinely all of it. Everything beyond that list is a job worth handing over. We cover Tavira, Cabanas, Santa Luzia and out through the eastern Algarve, and the full list is on the areas page.
Frequently asked questions
Why do my wall plugs keep spinning in the hole?
Because the plug is a solid wall expansion plug and the wall is hollow clay brick. It reaches a void, has nothing to expand against, and turns. Switch to a fixing designed to lock behind the thin ceramic web, such as a metal cavity plug or a hollow brick plug, or use a chemical anchor for anything heavy.
How do I know if my wall is hollow brick or concrete?
Knock it: a drummy sound means hollow brick or plasterboard, a dead sound means concrete or solid masonry. Then read the drill. Orange or red dust with the bit dropping into voids is hollow clay brick. Grey dust and hard going is concrete.
Can I hang a large TV on a Portuguese wall?
On a concrete column or a properly chosen anchor, yes. On plugs in a hollow partition, no, particularly with a cantilevered arm, which multiplies the load on the top fixings. The usual solution is a timber batten spreading the load over many points, a chemical anchor, or choosing a different wall.
What size screw do I need for an 8 mm plug?
Long enough to reach the full depth of the plug once it has passed through whatever you are mounting. With an 8 x 50 plug and a 10 mm bracket, that means around 60 to 70 mm. A screw that stops short only expands the front of the plug and loses most of its holding power.
Should I use hammer drill mode?
In concrete, yes. In hollow clay brick and old lime plaster, no. Hammer action breaks up the thin webs inside hollow brick and turns a clean hole into a crater that no plug will grip.